I've recently started school, and also have not been feeling that well. Hopefully I'll be back on board next week.
Thank you!
-Heather
Thursday, January 16, 2014
Tuesday, January 7, 2014
It's 2014! Let's play with coffee filters!
Now that the kids are back in school and the boyfriend is back at work, it's time to get back on track!
I don't have much prepared, so here's a simple craft to keep the little ones busy! Coffee filter flowers. That's right, adorable little flowers made with coffee filters!
*****I have no pictures, but will take one of the final product later today and post******
For our flowers we used 3 coffee filters each, and if I wasn't bunching them all together in a big bouquet I probably would have used 4 or more. Take some crayola washable markers (they're the best when it comes to bleeding) and have them make little dots all over the filter.
The middle will be bunched together and not visible, and the dots need to be a decent distance apart to avoid a hot mess when they put water on them. When all the dots are done they'll take a paint brush and dab a little bit of water on each dot to have them bleed and grow.
When they're all dry have your little one pick out a pipe cleaner (we used multiple colors to have a rainbow of stems) and bunch your filters together. Wrap the pipe cleaner around the bottom (the middles of all the filters) and when it's nice and secure, just fluff out the flower petals to see all the colors.
We're putting our bouquet in a care box to my mom when we finish decorating it to help cheer her up since we live so far away. We're also sending her some hugs, which I post about later this week.
Happy Crafting!
-Heather
Tuesday, December 10, 2013
Kids Craft Corner!

After a nice long weekend filled with school and chores, it's time for some super easy snowflakes! The best part is that they're super colorful too!
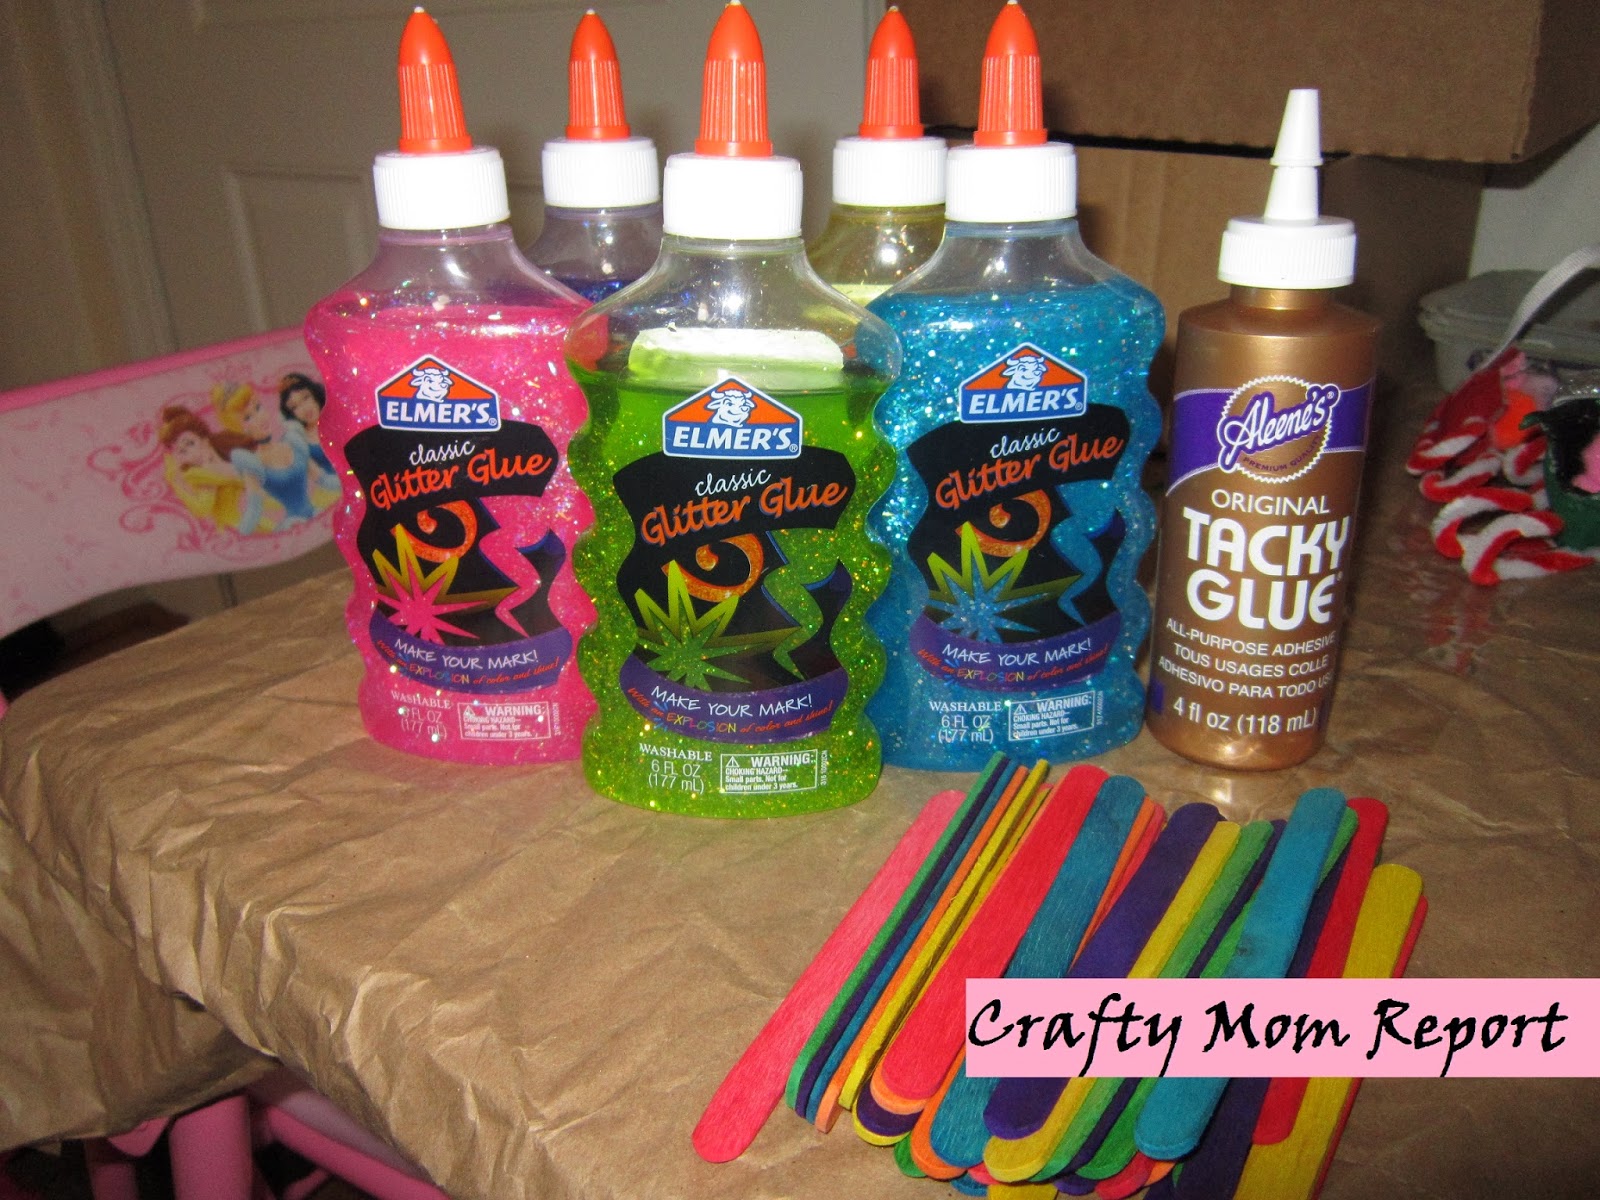
While the kids were in school, I took 3 craft sticks and glued them together. They were dry by the time they got home, so they could do the glitter glue themselves. I used all 3 of the same color for each snowflake, but there are a lot of beautiful color combinations you could do!

I taped ours up along the outer edge of the playroom doorway. I'd take a picture, but I'm trying to figure out what it's missing. When it's completed, you'll be the first to see (next to my facebook friends)!
Thank you for visiting!!
-Heather
Thursday, December 5, 2013
Let's Learn! - Coins
Today I want to share with you a set of poems to help your little ones learn about coins! I found this over at Mrs. Cates' Kindergarten blog.
 Our youngest just started Kindergarten in September, and we were told they'd be learning about money. I thought this was perfect as she is a very good reader, and she can review these whenever she wants.
Fold a piece of construction paper in half, any color you would like, and then cut slits down to the middle fold on one side only. On the inside your child can glue down some crayon rubbings of each coin (front and back!) along with how much they are worth. I just wrote down the value of each with a marker.
On the front flaps you'll want to glue a picture of the coin and it's name lining up with the inside content. The poems, which I have typed up and made available for you to download here, are glued to the inside of the flaps.
 Our little one got a little carried away with her flipping and ripped the one side. Nothing a little tape can't fix it! We also didn't have any quarters on hand to do the rubbings, so it's still on the 'to do' list.
Another shout out to Mrs. Cates' Kindergarten blog for the poems/idea! Hope you all enjoy!
-Heather

Fold a piece of construction paper in half, any color you would like, and then cut slits down to the middle fold on one side only. On the inside your child can glue down some crayon rubbings of each coin (front and back!) along with how much they are worth. I just wrote down the value of each with a marker.
On the front flaps you'll want to glue a picture of the coin and it's name lining up with the inside content. The poems, which I have typed up and made available for you to download here, are glued to the inside of the flaps.

Another shout out to Mrs. Cates' Kindergarten blog for the poems/idea! Hope you all enjoy!
-Heather
Wednesday, December 4, 2013
To Buy or Not to Buy? - Shutterfly edition
I will flat out admit that I am in love with Shutterfly.
They have so many different products available that it can be hard to choose what you want to buy. I mainly buy photo books; however, I have bought prints from there as well as a couple desk plaques.


When it comes to quality, I haven't had too many issues with them. As you can see below, at one time I thought there was a printing problem with a ghost sticker I used. I checked back on the site, and that is how it was supposed to look (thank goodness).


Thank you for visiting!
-Heather
Tuesday, December 3, 2013
Kids Craft Corner!
My mom sent me a link to some really cute Christmas crafts for the kids to do, and I found one that I knew they would love! Christmas Sleigh Ornaments!

Now originally these were supposed to be snowmen, but since we didn't have white pom poms, they're known as monsters.
You will need:


I glued my ribbon strips onto my egg cartons first; however, they did slightly get in the way when sprinkling in the glitter. You or the kids will want to paint the inside of the cartons, and while it's still wet sprinkle the glitter in. We used acrylic paints because that's what we had. You'll want to tap the glitter around all over the paint to get it as covered as possible.


After the insides were dried a bit, I painted the outsides myself and then slid them across an empty paper towel tubes. I placed that over the box (empty ramen boxes!) so the sleighs hung inside not touching to dry overnight.
In the morning, we twisted the pipe cleaner halves together to look like candy canes.

 I glued 2 onto the bottom of each egg carton sleigh (this part was a bit tricky and messy). After doing it, I realized it would have been easier to align the sleigh legs with the grooves on the bottom of the carton. I, however, had already glued the ribbon straps on pretty good.


After they're all dried (some may not stand correctly without support, but that's the fun of a homemade item right?) you can take 3 pom poms and glue them together. Make the snowman or monster with the googly eyes and arms. Use the sharpie to draw a mouth (which can be complicated). I had to circle the marker around to get the ink to take to the fuzz. You could probably paint it as well, or glue some felt pieces maybe.
Once they are put together, you can put some glue in the bottom of the sleigh (make sure to tap out any excess glitter in the boxes before squeezing glue in there!) and push them into their sleigh!

Questions or comments welcome! If you make some, feel free to share! I'd love to see your snowmen/monster sleigh ornaments! Happy Holidays~
-Heather

Now originally these were supposed to be snowmen, but since we didn't have white pom poms, they're known as monsters.
You will need:
- Egg carton (cut into cups and trimmed)
- Ribbon (cut into strips)
- Paint (Whatever you have)
- Glitter
- Red pipe cleaners (cut in half)
- White pipe cleaners (also cut in half)
- Pom poms (any color)
- Googly eyes
- Tacky glue
- Black sharpie
- Something for arms (brown pipe cleaners, wire, ect.)


I glued my ribbon strips onto my egg cartons first; however, they did slightly get in the way when sprinkling in the glitter. You or the kids will want to paint the inside of the cartons, and while it's still wet sprinkle the glitter in. We used acrylic paints because that's what we had. You'll want to tap the glitter around all over the paint to get it as covered as possible.


After the insides were dried a bit, I painted the outsides myself and then slid them across an empty paper towel tubes. I placed that over the box (empty ramen boxes!) so the sleighs hung inside not touching to dry overnight.
In the morning, we twisted the pipe cleaner halves together to look like candy canes.


After they're all dried (some may not stand correctly without support, but that's the fun of a homemade item right?) you can take 3 pom poms and glue them together. Make the snowman or monster with the googly eyes and arms. Use the sharpie to draw a mouth (which can be complicated). I had to circle the marker around to get the ink to take to the fuzz. You could probably paint it as well, or glue some felt pieces maybe.
Once they are put together, you can put some glue in the bottom of the sleigh (make sure to tap out any excess glitter in the boxes before squeezing glue in there!) and push them into their sleigh!

Questions or comments welcome! If you make some, feel free to share! I'd love to see your snowmen/monster sleigh ornaments! Happy Holidays~
-Heather
Subscribe to:
Posts (Atom)